Cheesy Taco Sticks: How to Make the Best Party Appetizer in 5 Easy Steps
Introduction: Have You Ever Thought About Turning Tacos Into Sticks?
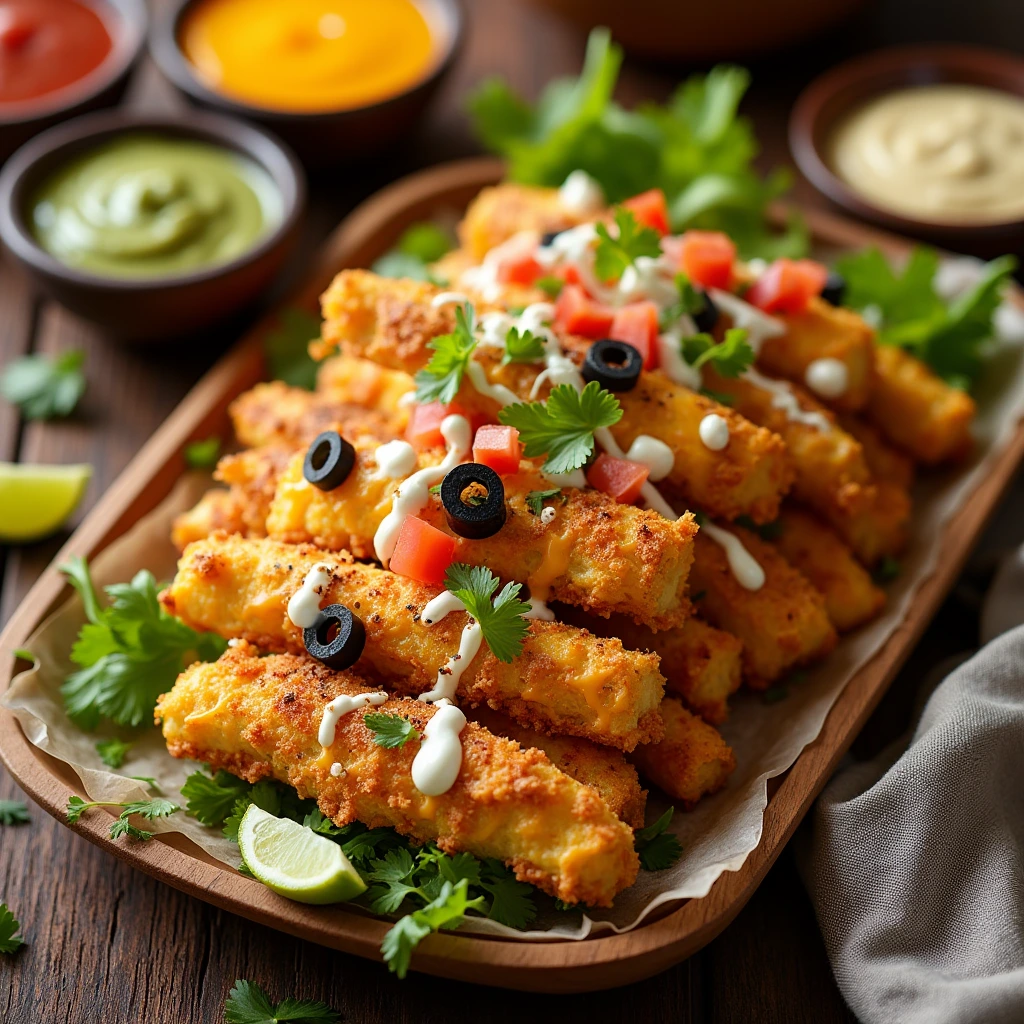
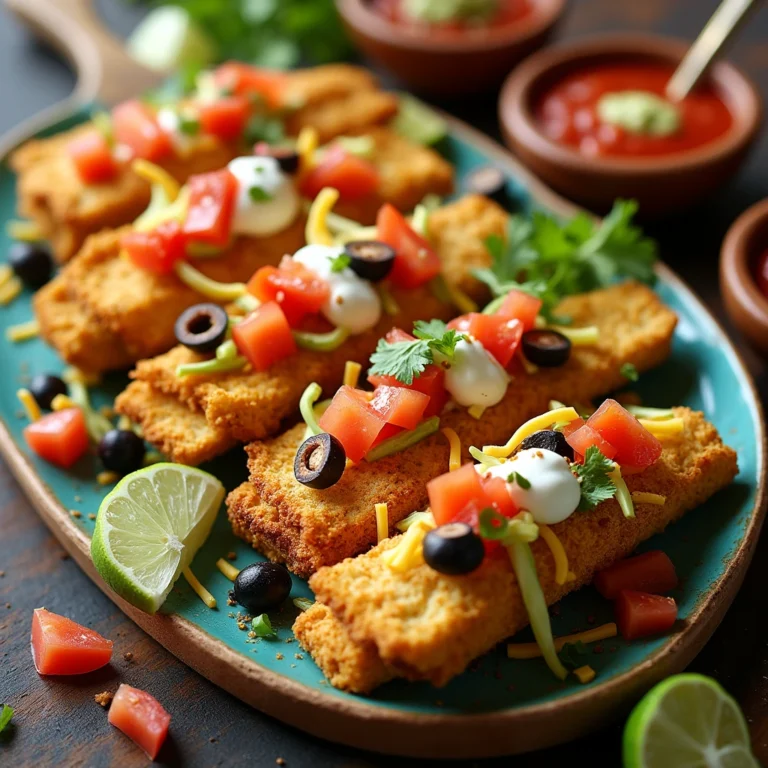
Have you ever wondered what happens when you take everyone’s favorite taco and transform it into a crispy, cheesy stick? Sounds amazing, right? Welcome to the world of cheesy taco sticks , where tacos meet finger food magic. These golden delights are not just tasty—they’re also easy to make and perfect for any occasion. Whether you’re hosting a party or craving something fun for movie night, this recipe will leave your taste buds dancing.
So, why settle for plain old tacos when you can upgrade them into bite-sized perfection? Let’s dive in and discover how these cheesy taco sticks are made!
Table of Contents
Overview: What Makes This Recipe Special?
Cheesy taco sticks are more than just a snack; they’re an experience. Here’s what sets them apart:
- Time Requirement : Prep and cook time is around 25–30 minutes.
- Difficulty Level : Beginner-friendly—no fancy skills required!
- Why It’s Special : With their crunchy exterior, gooey cheese center, and bold taco flavors, these sticks are irresistible. Plus, they’re versatile enough to cater to both kids and adults.
This recipe uses simple ingredients and basic techniques to create a dish that feels gourmet but is surprisingly easy to pull off.
Essential Ingredients: The Building Blocks of Flavor
To make cheesy taco sticks , you’ll need the following key components:
Main Components:
- Tortilla Wraps : Use flour tortillas for wrapping—the larger the better.
- Shredded Cheese : Cheddar or Mexican cheeses like queso fresco work best.
- Ground Beef or Turkey : Cooked and seasoned with taco seasoning.
- Taco Seasoning : Store-bought or homemade blends add authentic flavor.
- Vegetables : Diced bell peppers, onions, and tomatoes bring freshness.
- Eggs : Used as an egg wash to seal the tortillas before frying.
- Oil : For frying or baking, depending on your preference.
Substitutions and Variations:
- Swap ground beef with beans or Beyond Meat for a vegetarian option.
- Add extra toppings like guacamole, sour cream, or hot sauce for a personalized touch.
- Use corn tortillas instead of flour for a crunchier texture.
Step-by-Step Instructions: Cooking Made Simple
Now that you’ve gathered your ingredients, let’s break down the process step by step.
Step 1: Prepare the Filling
- Brown the ground beef or turkey in a skillet over medium heat.
- Drain excess fat and stir in taco seasoning according to package instructions.
- Mix in diced vegetables for added color and nutrition.
Tip : Let the mixture cool slightly so it’s easier to handle during assembly.
Step 2: Assemble the Tortillas
- Lay out a tortilla on a flat surface.
- Sprinkle shredded cheese evenly across one half of the tortilla.
- Spoon a line of the taco filling along the edge closest to you.
- Roll the tortilla tightly around the filling, tucking in the edges as you go.
Pro Tip : Don’t overfill the tortilla—it may burst while cooking!
Step 3: Seal the Edges
- Beat an egg in a small bowl and brush it lightly along the open edge of the rolled tortilla.
- Press gently to seal the stick shut.
Step 4: Fry or Bake
- Heat oil in a deep skillet or fryer to 350°F (175°C).
- Fry the sticks in batches until golden brown (about 2–3 minutes per side).
- Alternatively, bake at 375°F (190°C) for 15–20 minutes after brushing with melted butter.
Health Tip : Baking reduces calories without sacrificing flavor!
Assembly: Bringing It All Together
Once your cheesy taco sticks are cooked, it’s time to serve them up! Here’s how:
- Arrange the sticks neatly on a platter.
- Serve alongside classic dipping sauces like salsa, ranch, or chipotle aioli.
- Garnish with fresh cilantro or green onions for a pop of color.
For presentation ideas:
- Cut the sticks into smaller pieces for bite-sized appetizers.
- Place them upright in a cupcake tin filled with rice or lettuce for a decorative display.
Storage and Make-Ahead Tips: Keep Them Fresh
Leftovers or prepped-ahead cheesy taco sticks can be stored easily. Here’s how:
Storage:
- Cool completely, then store in an airtight container in the fridge for up to 3 days.
- Freeze uncooked sticks for up to 2 months. Simply thaw and fry/bake as needed.
Reheating:
- Oven: Place on a baking sheet and reheat at 350°F (175°C) for 8–10 minutes.
- Air Fryer: Cook at 375°F (190°C) for 5–7 minutes for crispy results.
Recipe Variations: Get Creative!
Feel free to tweak this recipe to match your tastes. Here are some creative ideas:
- Veggie Version : Replace meat with roasted veggies or black beans.
- Spicy Twist : Add jalapeños or cayenne pepper to the filling for extra heat.
- Low-Carb Option : Wrap the filling in large lettuce leaves instead of tortillas.
- International Flair : Experiment with different seasonings like curry powder or Italian herbs.
Conclusion: Time to Get Rolling!
There you have it—a delicious and easy way to make cheesy taco sticks that everyone will love. Whether you’re entertaining guests or treating yourself to a comforting snack, this recipe delivers big flavor without much effort. So grab your tortillas, get rolling, and enjoy every cheesy bite!
FAQs: Answers to Common Questions
Q: Are cheesy taco sticks healthy?
A: While they’re indulgent, using lean meats and baking instead of frying makes them healthier. Plus, adding veggies boosts fiber and nutrients.
Q: Can I prepare cheesy taco sticks ahead of time?
A: Absolutely! You can assemble and freeze the sticks, then fry or bake them straight from the freezer.
Q: What’s the best dipping sauce for cheesy taco sticks?
A: Classic choices include salsa, guacamole, or creamy chipotle dressing. Experiment to find your favorite!
Q: How do I prevent the filling from leaking?
A: Ensure the tortillas are sealed properly with an egg wash and don’t overfill them.

